This article is going to give you the full information and installation process for RXCamView For PC application. You will get the downloading and installation process for Android OS and Windows OS.
We will define to you here the step-by-step analysis for installing RXCamView For PC on any Android-based mobile. You will get here the installation, logging in to the app, and the device addition. The link is also given in the installation section. Click the link to get the software. There are many CCTV CMS Apps available.
Similarly, this article illustrates you to load and install this app on Windows. You can run it with the help of an Android Emulator app. We have demonstrated here the Bluestacks emulator. With its help, the application file can easily be run and monitored on the PC.
Know About RXCamView For PC
RXCamView For PC is an application that is used to connect many devices with it at a time and show them on a single screen from any remote place. The app is designed and manufactured in such a way that it can connect more than 15 devices at a time.
You have to scan those gadgets or add them manually for connecting them. ZhnagHao has offered the app. It is a highly successful software for monitoring and supervising. The app has many latest functions and features.
It can show you the live relay. There is no delay in event capturing and video monitoring without any time lag. The two-way feature allows the message conveyance. It gives you supervision and control of the activity. Thus, you get mental peace and proper monitoring of your property and work.
Features & Functions Of RXCamView For PC
The app has many prominent advantages. The user has features at their disposal to operate. You can operate the device from any place. Remote Access is the best advantage that the user gets from this software. You can access and monitor your location. These are its major characteristics.

- The application gives live feeds of the event
- There is no time lag in capturing and relaying
- The app can connect more than 15 gadgets at a time
- The app is powerful enough to equip the user to operate
- You can also operate a PTZ gadget
- You can pan, tilt and zoom the device without any difficulty. You can zoom in and zoom out
- The app supports two-way audio. You can pass any message to the person on the device end
- You can raise an alarm by screaming or shouting at any suspect with this feature
- The app supports sensors. It can sense any motion and audio.
- You can also pre-define sensitive zones. When anyone enters those sensitive zones, the app pushes messages and raises alarms.
- This software can record activities, store data, show you playbacks, and take snaps. You can also keep the recording on the cloud server
Install RXCamView For Androids
To install the application, we have to go to the google play store and search for the software. After that install it. Get the App Link Here.

Step-1 Install The App
To install the application on a smartphone, we have to look for the app on the google play store. Open the page and search RXCamView. This page will appear on the screen.

The app appears. It is asking for us to install the application. Click the installation button. The begins to load.

It takes only a few seconds to install. After the installation, it notifies you that the file is loaded. Open it for the next step.
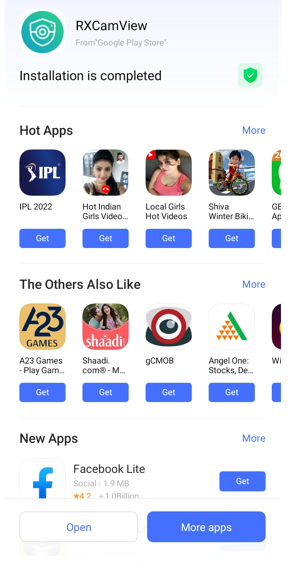
This page will open. It means that the app is installed.
Step-2 Logging In & Adding The Device
To add the device, we have to accept the terms and conditions for the software. It will show in the next window. Read the agreement properly. If you find it suitable for you, then press the allow button.

When you press the allow button to accept the terms and conditions, this page will take you to the next window.

The app is asking you to add the device. For this, you have to press the “+” sign. When you press the icon, the following options appear on the screen.

To add the device, you have to scan the gadget. Or you can go for manual adding. Select the option, whichever you want to follow. Here, we are going for manual adding.

We have here added the device manually. for that click the Manual Add button. This window will open for you.

We reach the following page.

This page is asking for the IP address, port, ID, and password. Fill them out to get the gadget connected with the app.

This way it adds the device. When we put in these figures, we get at the following window.

This way the gadget gets connected.
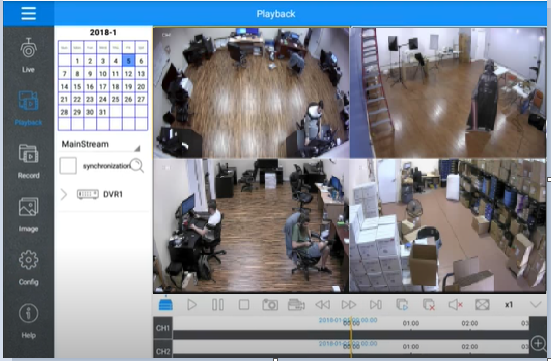
Step-3 Monitor The Location
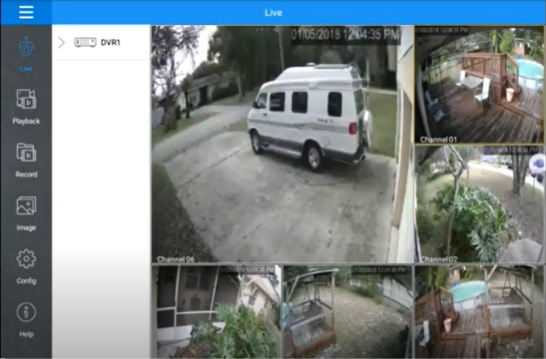
After the gadget gets connected with the device, the cameras added to the device appear on the screen and monitoring begins.
This is the step-by-step process to load and install the app, add the device and monitor it. We have completed this process for Android OS.
How To Connect RXCamView For PC?
Connecting the device with the computer is not possible for Windows OS and Mac OS. But if you still want to watch it on the PC, you have to take the help of the Android Emulator.
An Emulator is a software that can be loaded on Windows OS or Mac OS. This way you can load Android Apps on PCs and function them. Mainly these emulators are used for playing games on Computers. We will use the app here for monitoring CCTV cameras. For that, we download and install the gaming app Bluestacks.
Download & Install BlueStacks Application
Here, we will download and install the BlueStacks app first. For that, we have to search the app on the search engine. Search the app and download the file to get the application on the PC. You will get on the following page. Select the app to load.

After selecting it, click the file to load. The following page appears.

It is asking us to allow the changes it is going to make. If you are prepared for that, click the yes button. It will bring in the root file page.
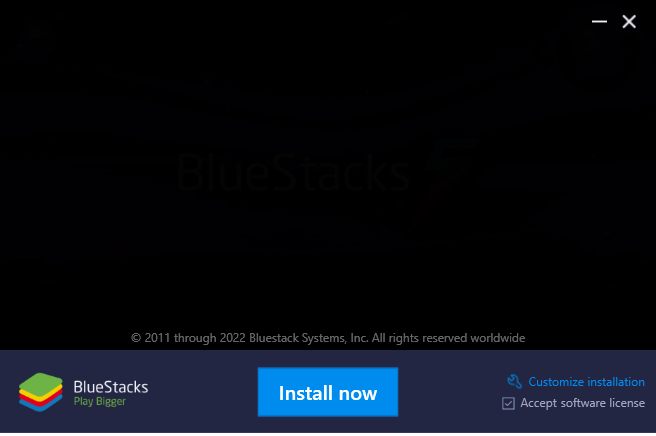
Press the install now button. This way it begins to load the software. It takes a few minutes to load it. After getting emptied its contents, it notifies you.

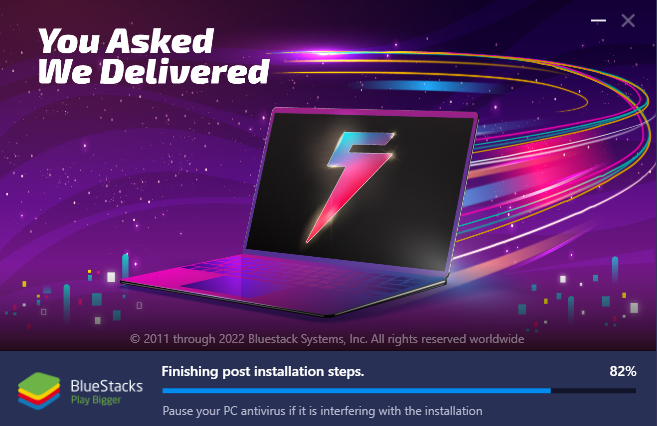
The software is downloading the root file. When the loading finishes, it begins extracting the file.

The file is extracted. When it is extracted, then the loading finishes. It is an automatic process. It begins and finishes automatically.
This way the installation of the root file is completed. The BlueStacks is loaded on the PC. The homepage of the software appears.
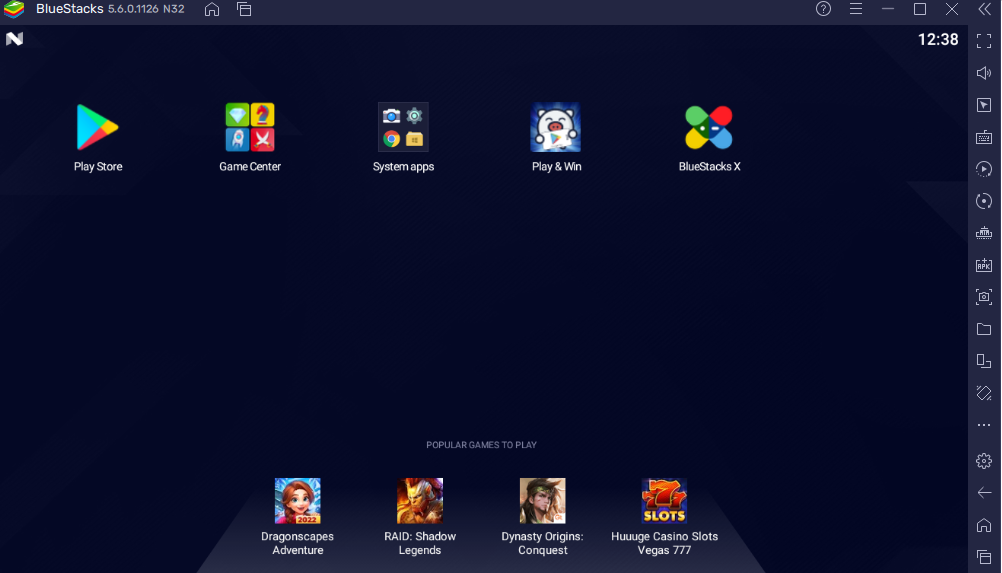
Now, we see the play store page on the screen. We can search any app on the play store and download it on the Computer.
Now, we will install the RXCamView Wizard on the Computer. You can load Bluestacks on Windows and Macintosh PC both.
Install RXCamView For Windows With The Help Of Bluestacks
We can install the app by using Bluestacks. We are showing you the step-by-step process to do it here. It is done in three steps. The first step is for installing the app. The second step is about adding the device. The third step is for monitoring the application.
Step-1 Sign In & Install The Software
We go to the BlueStacks app homepage and open the google play store to install the app. It asks us to sign in to the play store first. We sign in with the mail Id.

After signing up for the application, we reach the following page.

This window is about searching the application file. Put in the software name and search to install it on Windows.

We are looking for the RxCamView For Windows. It appears here. We search and install the file. Press the Install button. The following action occurs.

The installation begins. It is only a matter of a few seconds before it finishes.

The page indicates the following instruction to open the app. It shows that the software is installed properly. Now, we will switch to the second step. It is about adding the device.
Step-2 Adding The Device
The app is installed. We will go for adding the gadget. To add the gadget we will click open the icon which we have just installed. This page appears on the screen.

It is about the terms and conditions. Read the Privacy policy till the end. If you have no issue loading it, press the allow button.

We have to add the device. For that, we have to press the “+” button. Click it, and it will instruct you on the next step.

We can connect by scanning the device or we can add the device manually. Both are easy to add.
If we add through scanning it, then the QR code of the gadget is scanned. Then it shows further instructions. We follow them and the device is added.
If we add manually then we have to mention the device’s IP address. The IP for every gadget is unique. Press the IP/NVR/DVR option. This window will emerge on the screen.

We have given here the IP address, the port, username, and password. The username and the password we use here belong to the device we are adding. This way the device is added from the CMS Wizard.
Step-3 Monitoring Of The Gadget
After adding the gadget, monitoring begins. The app shows us the basic monitoring device functions. Understand them, then you will be able to operate the device properly.

Press the OK button. The device connected with the app will show. All the cameras associated with this application appear on the Windows PC screen. This way we will monitor this Android app on Windows.
We have shown you here, that how you can do it for Windows PC. A similar process can be repeated for Mac also.
Conclusion
We have explained here the RXCamView For PC software. You have seen that the app can connect many devices with it and show us on the screen from any remote location.
If we have five different locations and each location is governed by CCTV Appliances, then you can see all these 5 sites simultaneously with its help. It gives you the freedom to move and instruct from any place, as you can access these devices from anywhere.
We have also shown here, that how can you operate this Android-based software on Windows PC. You have found the complete illustration and every step here. Each step is supported by images and instructions. How an Android Emulator helps monitor the security surveillance system on a PC is demonstrated here.
If you find any issues in dealing with the software or installing it, please mention them in the comment section. We will tackle the issue and try to give you a probable solution.
Thank You.